

Coastal 101 - Building A Fence Corner
April 28, 2016Good fences start with strong corners
Building a strong corner is a crucial factor in a sturdy fence. Along with gateposts, fence corners are one of the most important terminal points of any fence. Corners hold the most amount of tension and a strong and stout corner will anchor the fence so that tension doesn’t let up, as well as keeping the fence in good stead for many years to come.
Getting Started
Variables like soil type, fence height, type and livestock type play a role in knowing what you'll need to build your fence. Selecting the right materials for you corner post project is easy with a little help from Coastal. Each of our nearby Coastal stores have the posts and tools you need, and the know-how to get it done right.
Post Type - Generally speaking, corners are built with pressure treated wood posts. Pine and Douglas Fir are the top two choices for our Northwestern climate and soils. Your nearby Coastal carries the type of post that is best suited to your region's unique soil and weather conditions. There's no post that lasts forever, but we do our best to get you the materials that will last the longest.
Post Length - Most upright posts will have between 24" and 30" of the post buried below ground. Each fence project is different though. If you're in a region with sandy or soft soils, sink your posts deeper into the ground to provide a strong backbone for your fence to pull against. An 8' post is typically adequate for most situations.
Post Diameter - A good, sturdy corner is never a wrong answer. Using a pressure-treated posts that measure 5" or 6" in diameter for the uprights and corner will produce a firm foundation when you begin to stretch your fencing. A strong corner resists tension not just during fence construction, but also keeps fences tight after years of livestock leaning, trees falling on your fence, or the occasional stray tractor during haying season.
Strainers - A good corner bears fence tension by distributing the load across one or two upright posts and the corner post. To help distribute the load, an in-line ratcheting strainer is used to transfer tension from the top of the uprights to the base of the corner post near the ground (the strongest point of the corner). The strainer also helps keep everything square when you pour on the tension during your fence building process.
Braces & Pins - Braces are horizontal pressure-treated posts that connect uprights to the corner post. Often referred to as the "H" brace, the 4" or 5" diameter post should be roughly the same length as your upright posts and positioned about 12" below the top of your vertical posts. Brace Pins are used to hold the "H" braces in place during construction and tensioning of the corner.
Get to work
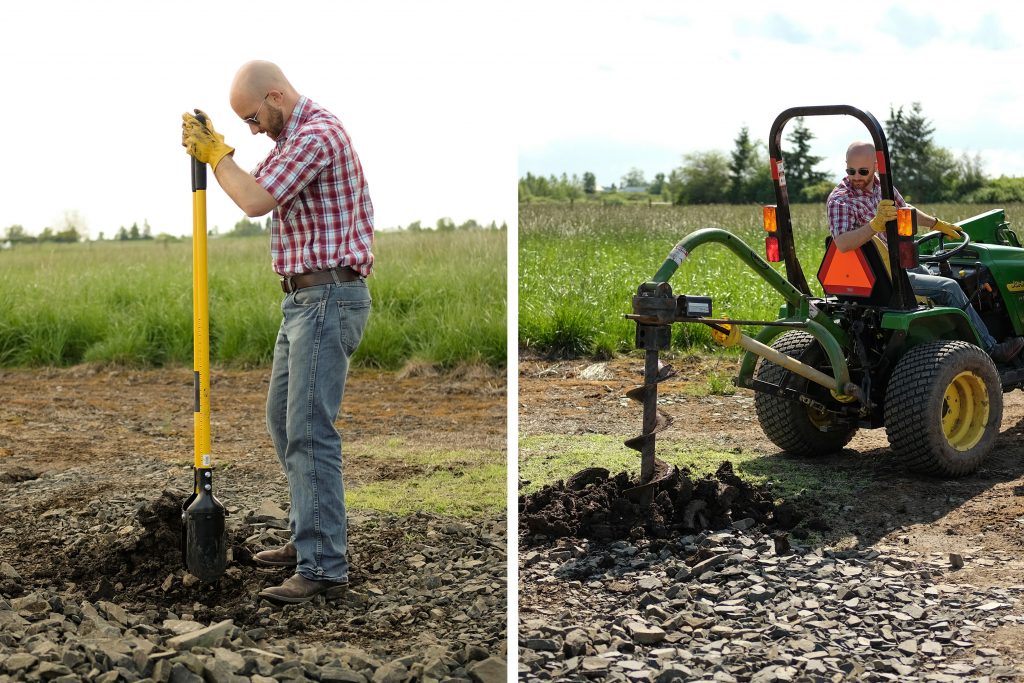
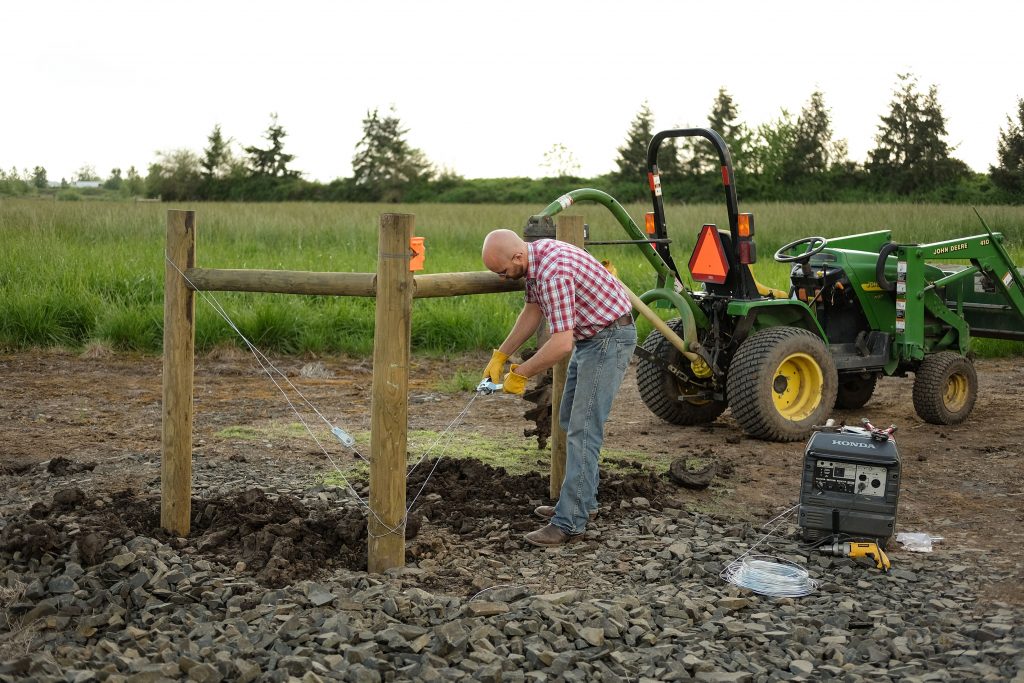
The most inglorious part of building a strong corner is digging the post holes. Many young men and women have found themselves on the working end of a manual post-hole digger, learning about the value of making good decisions. To make life a little easier, Coastal carries a number of SpeeCo implements for use on the farm or ranch. The hydraulic post-hole digger (auger) makes short work of punching holes in the ground and is great for lots of other projects.
Set your posts and braces
You've got all your materials, now it's time to get down to business. Select your location for the corner of your fence and dig a hole for the corner upright post. Set your post in the hole, confirm the depth is 24" to 30" and plumb the post with a strap on post plumb. The post plumb will indicate that the post is plumb in all directions. Fill the hole and tamp the dirt, making sure your post stays plumb.

Dig a hole for the next upright just under 8' away from your corner post along your fence line. Confirm the post is the same depth as your corner post and drop your upright post in the hole - do not fill in this hole yet.
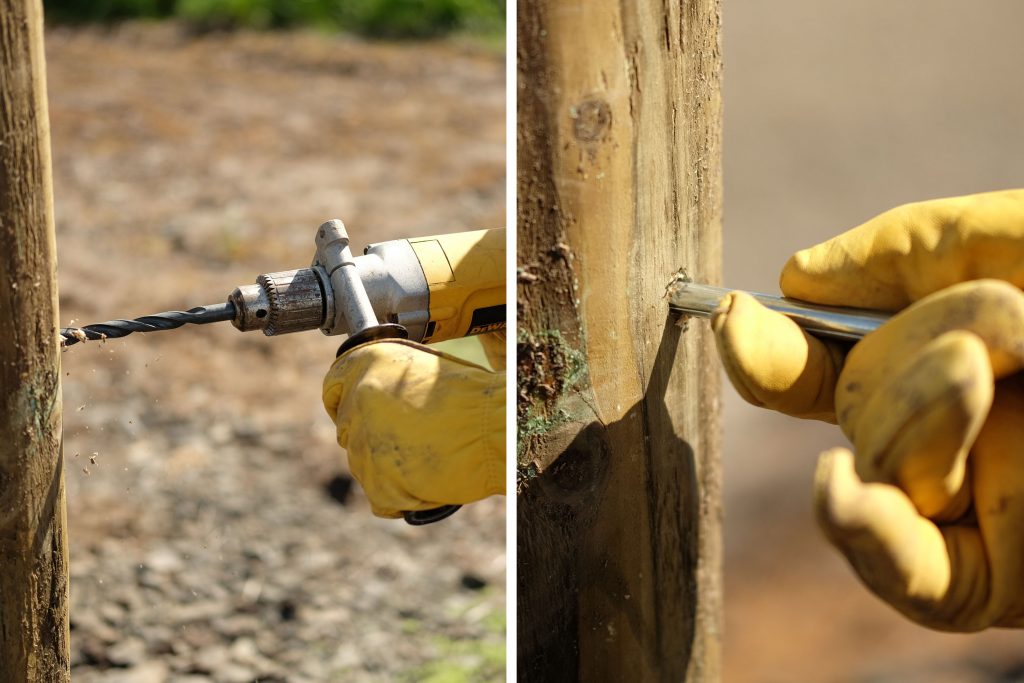
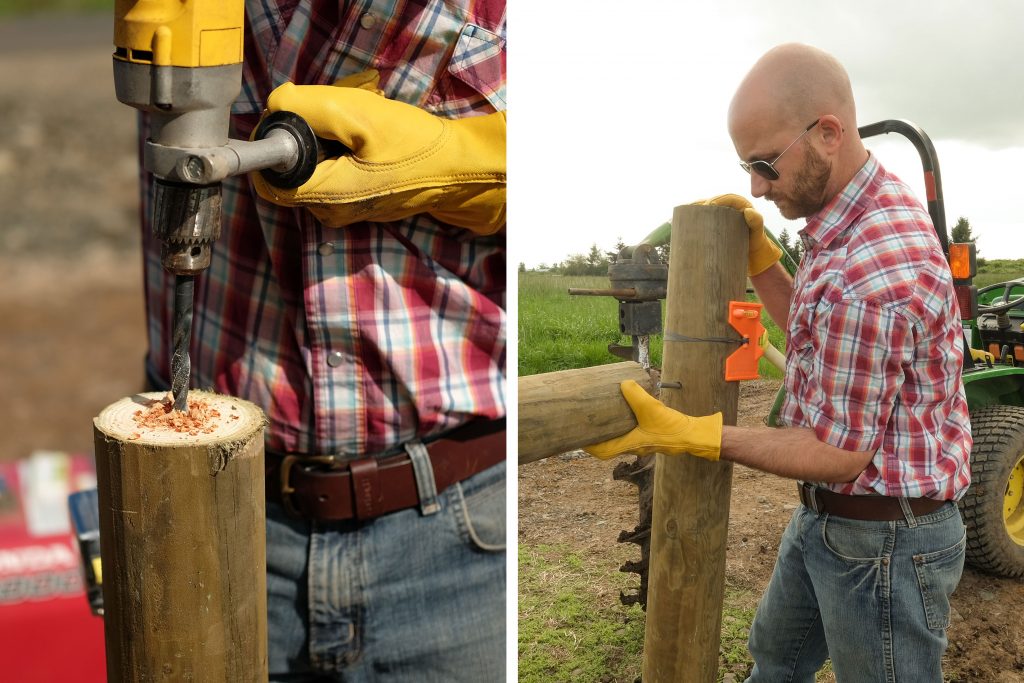
Set the brace pins next by making a mark on the upright post about 12" from the top of the post and drilling a hole horizontally to receive the pin. Repeat the procedure on the corner post. Be sure that your hole and pin point directly at your upright.
Cut your "H" brace to fit between the corner post and the upright by holding the upright plumb and measuring to the face of the corner post. Cut your brace and drill a hole in the center of the back ends to receive the brace pins. Lean your upright post out enough for the brace pins to slide into the brace ends and bring your upright plumb. Check plumb and fill in the post hole for your upright.
Repeat the procedure for the upright on the fence line heading 90 degrees in the other direction.
Tie it all together
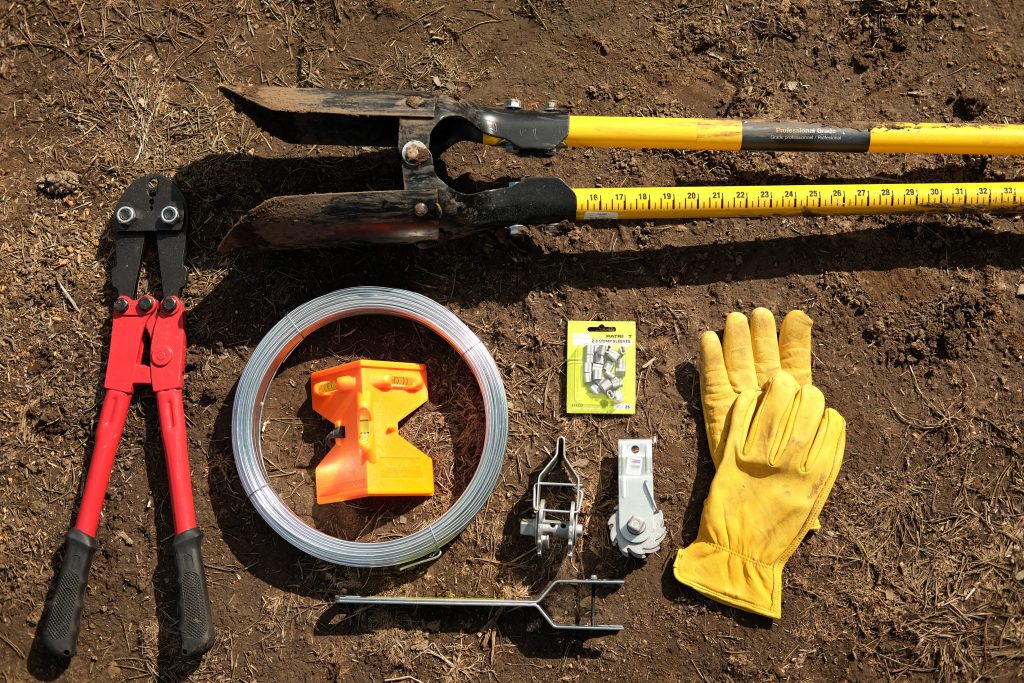
With your posts in place it's time to draw it all together with an in-line strainer and some 10 gauge or 12.5 gauge wire. We recommend tapping a fencing staple into upright on the face opposite the brace, about 12" from the top of the post. Then, tap another staple over the top of the first staple, leaving enough room to run your straining wire through the opening.
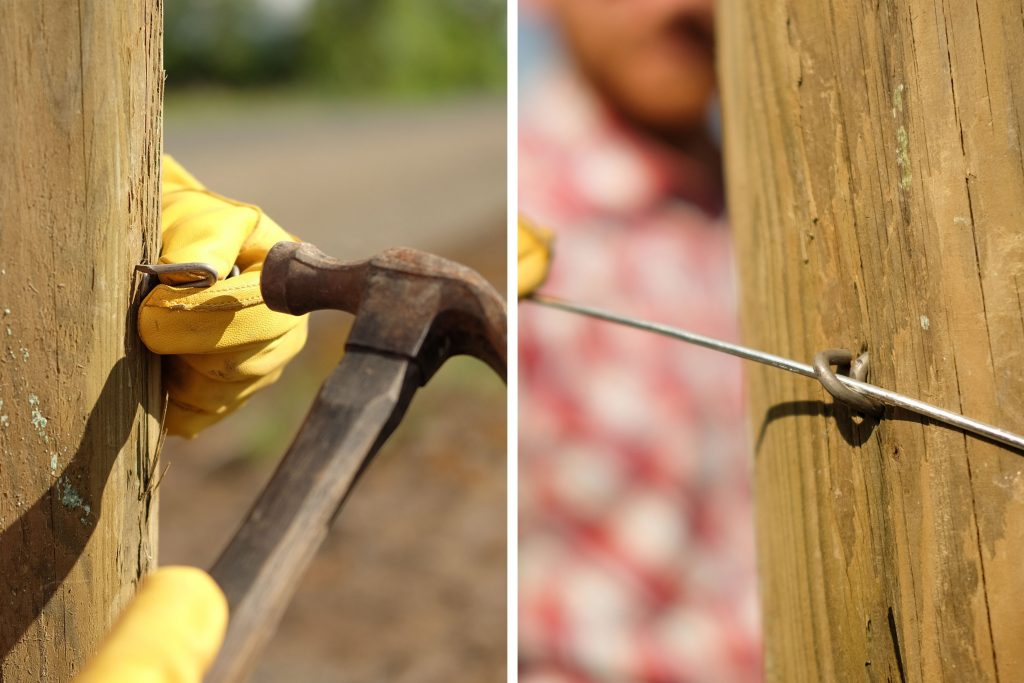
Repeat the process on the base of the corner post, a few inches above ground level, then run your straining wire in a figure-eight pattern around both posts. Cut your straining wire with about 8" of overlap and slide two crimps about 12" up the wire. With the crimps loosely in place, feed the loose end of the wire through the base of the in-line ratcheting strainer, fold the wire over and slide the open side of the crimp over the loose end of the wire.
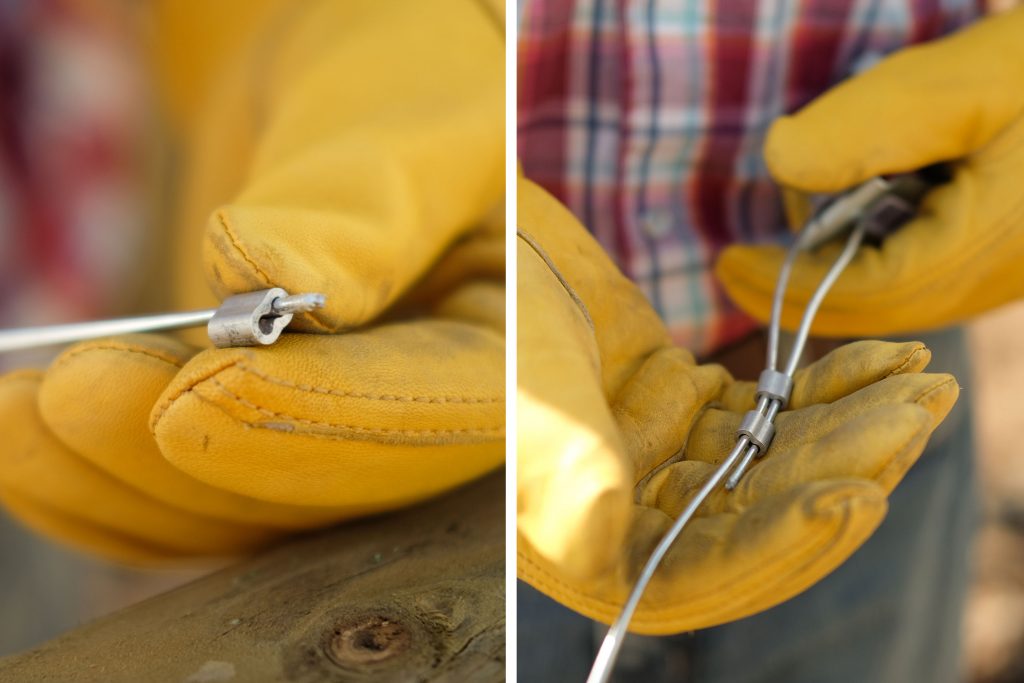
Find the number marking on the crimp tool that matches the crimps chosen for the gauge of wire you're using. Use the crimping tool to secure the crimps onto the wire that holds the in-line strainer.
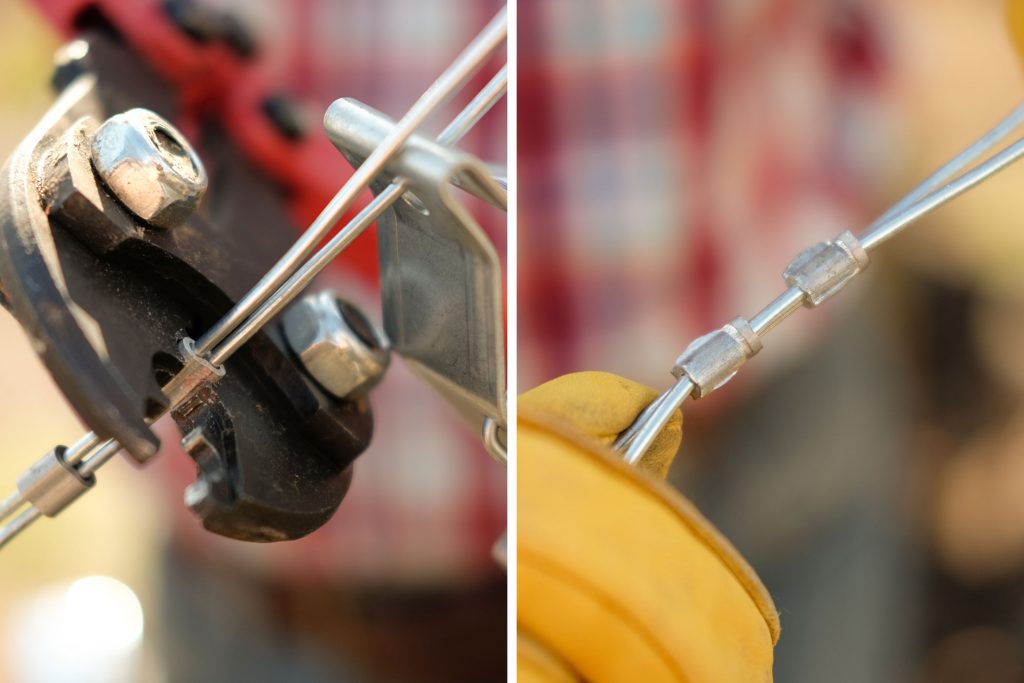
Once the strainer is secured, feed the loose end of the straining wire through the openings on the spool of the in-line ratcheting strainer. Bend the wire over, cut off the excess wire and use the included ratcheting handle to begin drawing the straining wire taut.
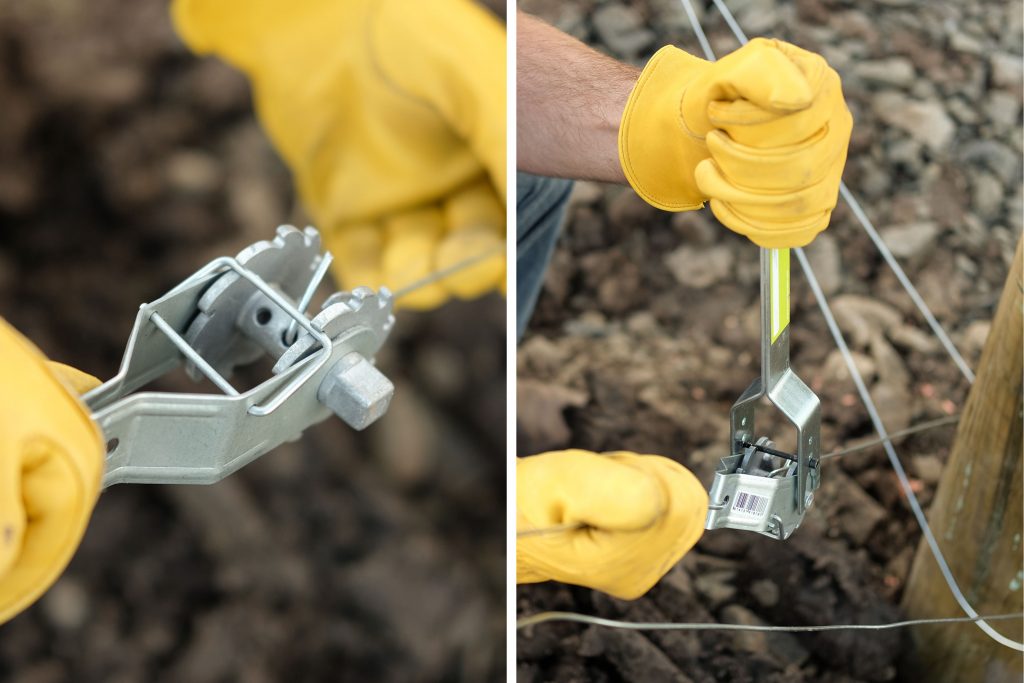
Repeat the process on the other brace. Slowly bring both strainers taut, making sure to keep your posts square and plumb. Congratulations, it's time to start running fence! Your new fence corner should provide the foundation you need to hold in those Herefords for years to come.
If you're unsure about what kind of fence to run, what types of posts to use and what spacing you'll need, we've got you covered. Drop in to your nearby Coastal and ask for one of our fencing specialists. They're on hand to help you plan your project and they've got the tips and tricks to make it a breeze.
You can also sign up for upcoming how-to articles! We'll send you a note when we post new articles so you can be "In the know" as soon as we publish these helpful tidbits.